
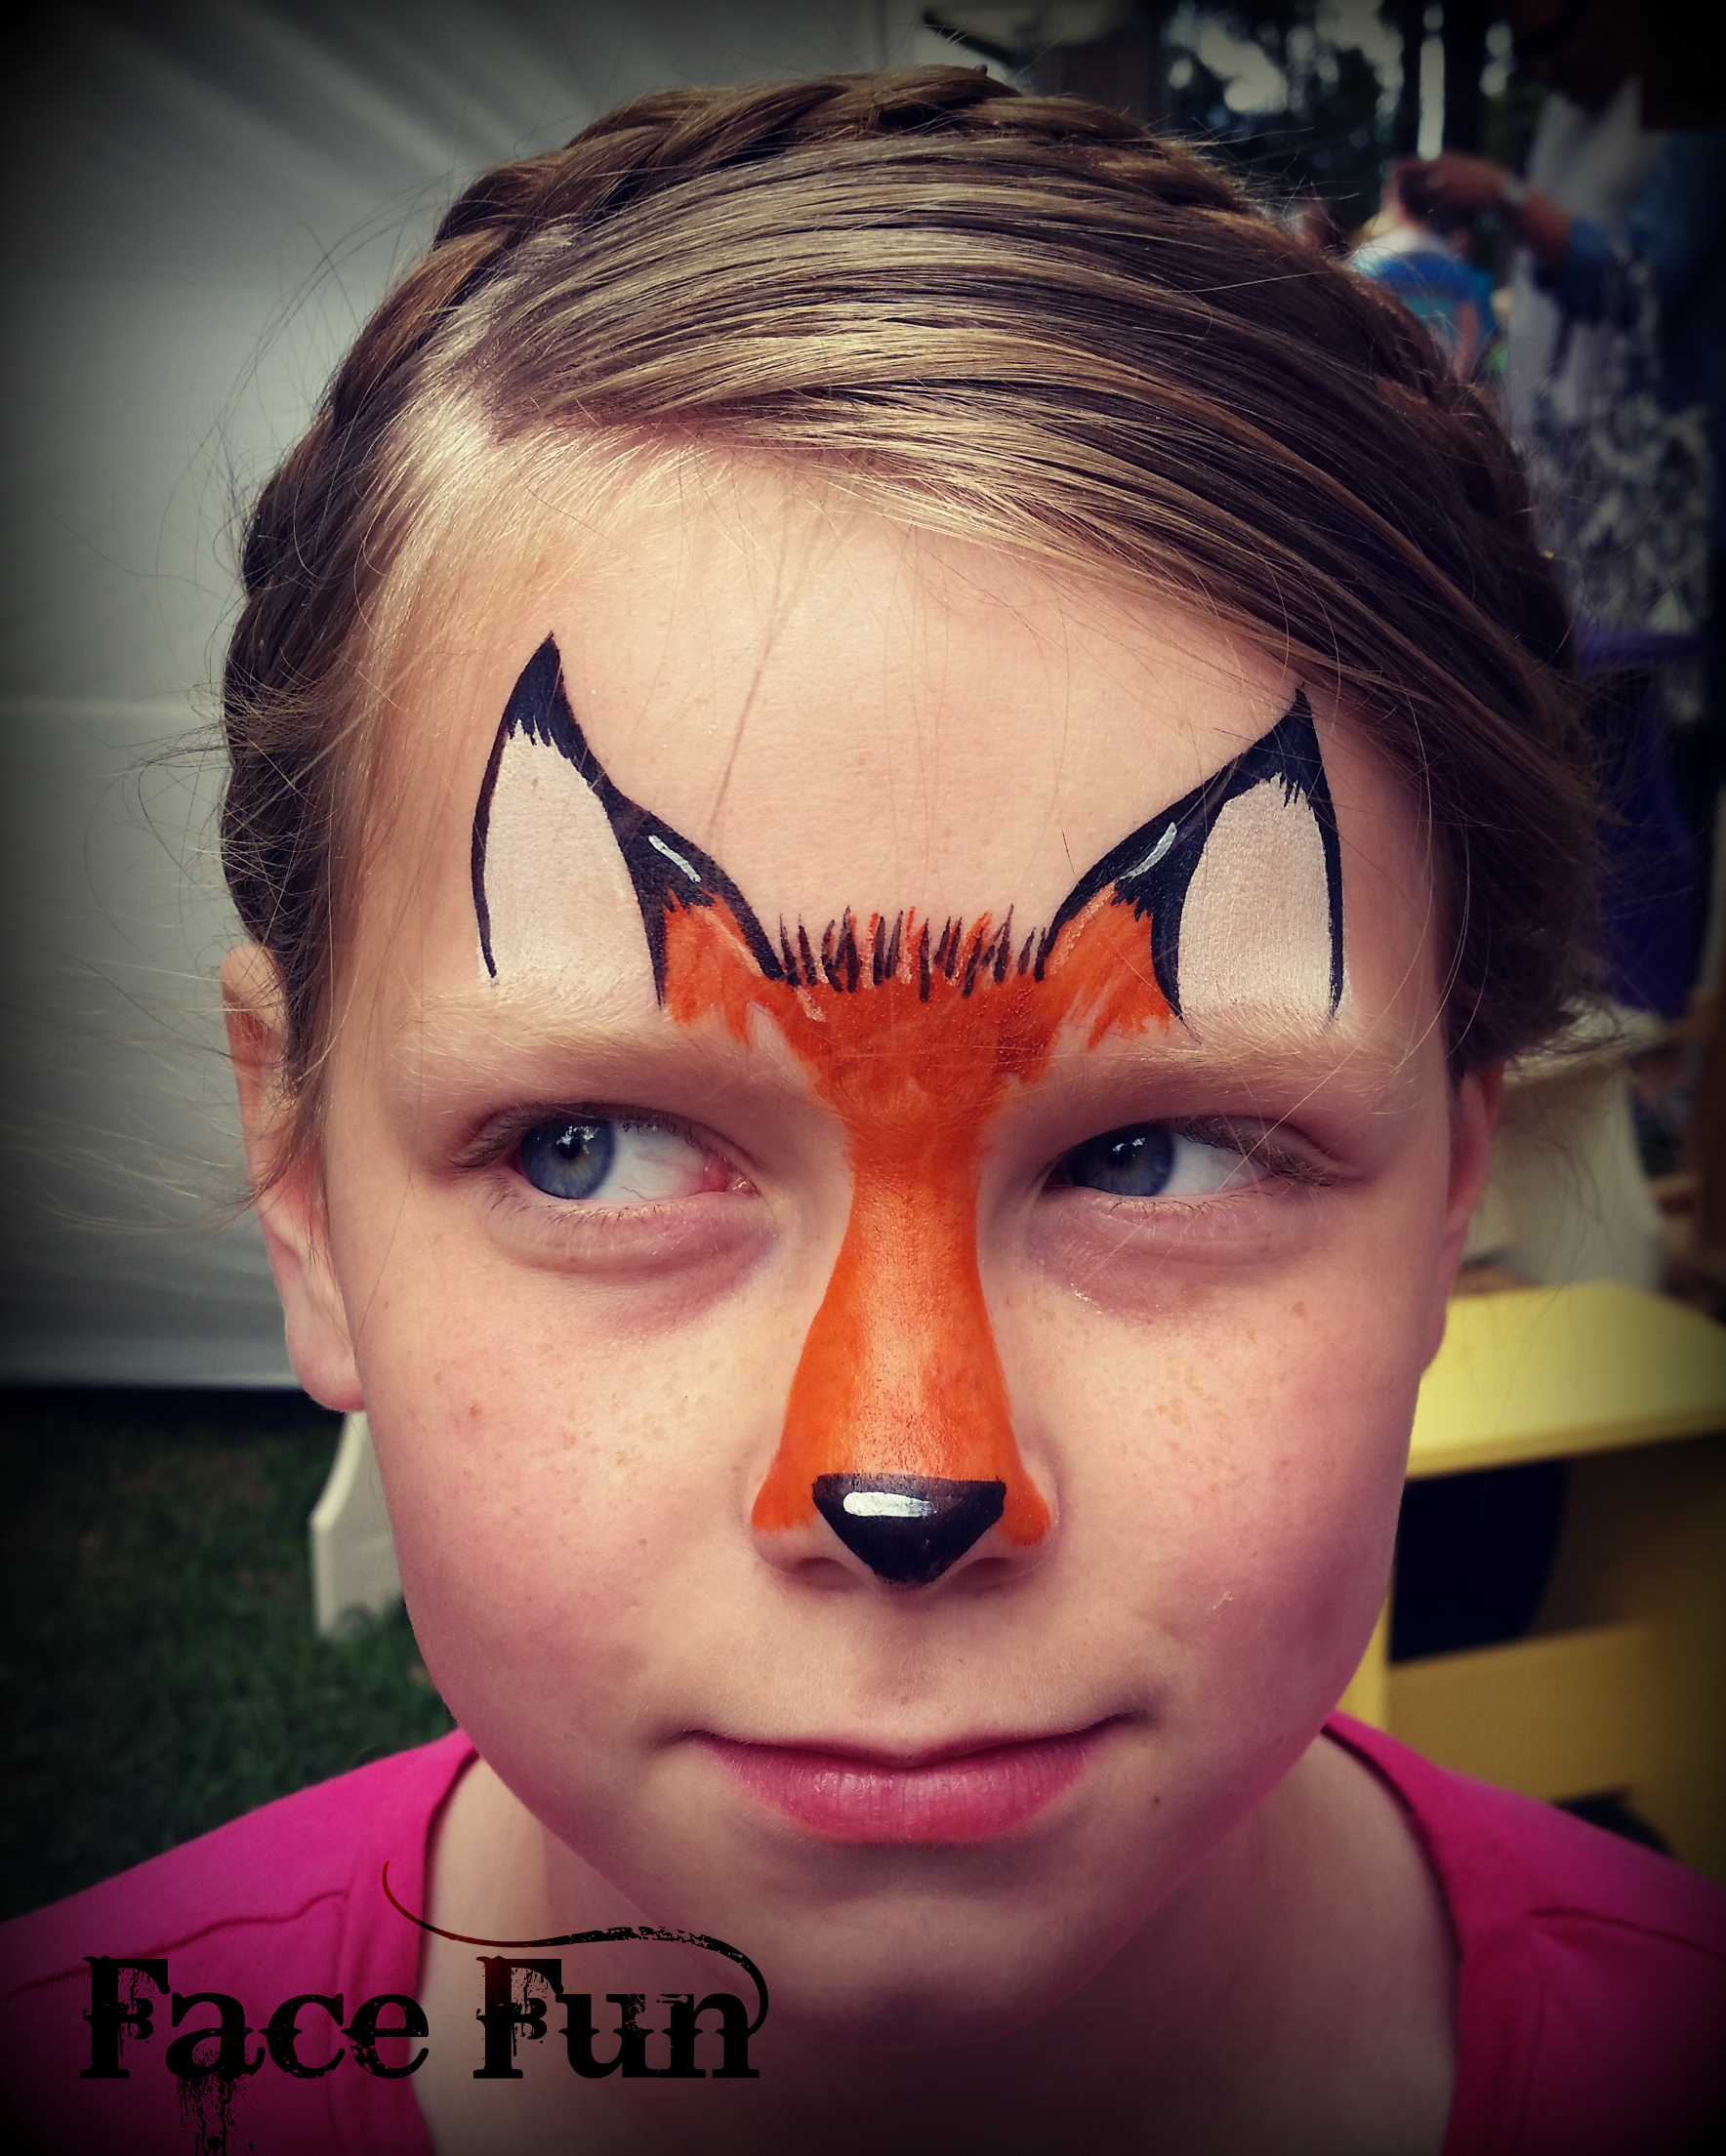
The fox face paint is one of my favourites looks. This look has been done when raising awareness for the wildlife trust. Moreover, in animal or outdoor parties the fox face paint looks amazing and mega cute!
Step 1
Start by painting on the white ears. Find the middle of the eyebrow and craw a curved line up. Then from the end of the eyebrow, draw another line, joining it to the previous ones. Depending on the size of the forehead you may need to make your ear’s smaller. The goal is to create ears that perk up, just like a fox.
Step 2
Taking a medium size flat brush, coat it well in orange paint. Begin to paint the base of the orange muzzle. If you slightly go over the white ears with the orange paint, that isn’t a problem (we are going to clean it all up later). In between the ears we recommend moving the brush onto its side and flick upwards to create a fluffy hair effect.
Step 3
Take a thin, small brush and outline the fox face. Start by outlining the outside of the fox’s ear. We then paint on the ear hairs, starting in the left bottom corner and flicking out (3 hairs is normally enough) Then outline the rest of the ear.
TIP
When outlining the nose, you want the lines to be close together, in order. To create an illusion of a small thin nose. Also, draw on a small, triangle nose as well as outlining the flicks on the fox’s hair.
Step 4
Taking the thin, white brush again draw on highlights along the bridge of the nose, on the nose and around the fluff bit between the ears.
Step 5
Finally, using the thin black brush draw on freckles along the cheekbones.
Optional
Is to add glitter to the look. The places you should put this on the nose, nose bridge, ears and cheekbones (silver glitter is best!).


For visual and more information, you can watch our YouTube video. https://www.youtube.com/watch?v=eY0-bKmUp58
Our other services include:
Balloon Modelling
Candy Floss Hire
Party Package