
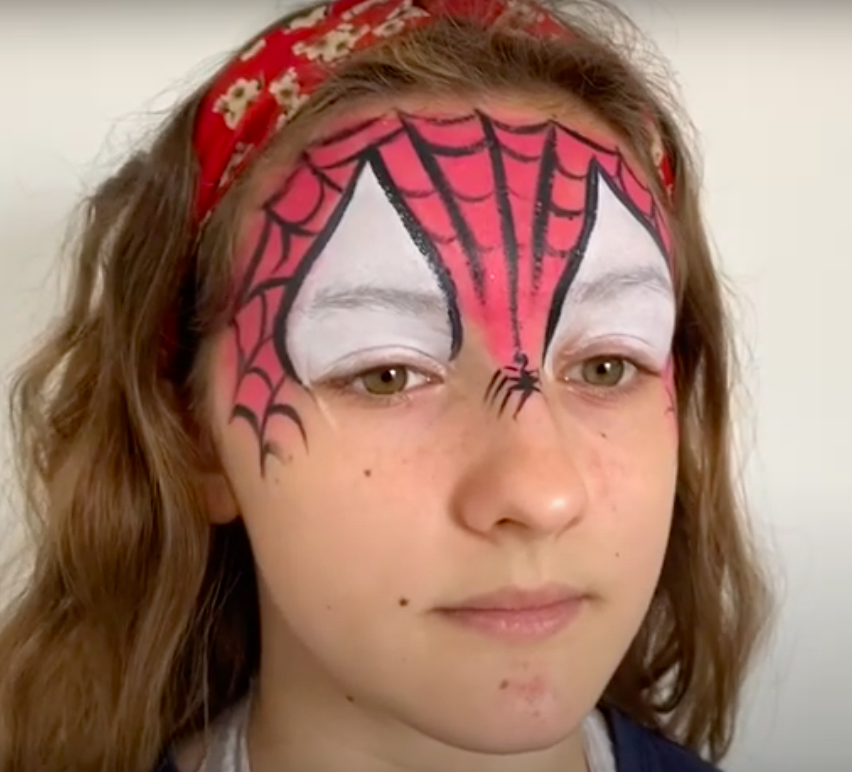
Face Painting Design for beginners: How do you face paint spiderman? Spiderman is a favourite for many and is chosen at every event, no matter how old the guests are. Face Painting Sheffield wants you to be able to create this iconic look at home, before your do face painting hire.


You will need for the Spiderman design:
Firstly, red, white and black face paint. Secondly, three brushes (thin small brush, flat medium brush and standard brush). Thirdly, Two triangle sponges (ideally one cut in half for more precision). Lastly, spray bottle or cup of water.
How to do the face painting design:
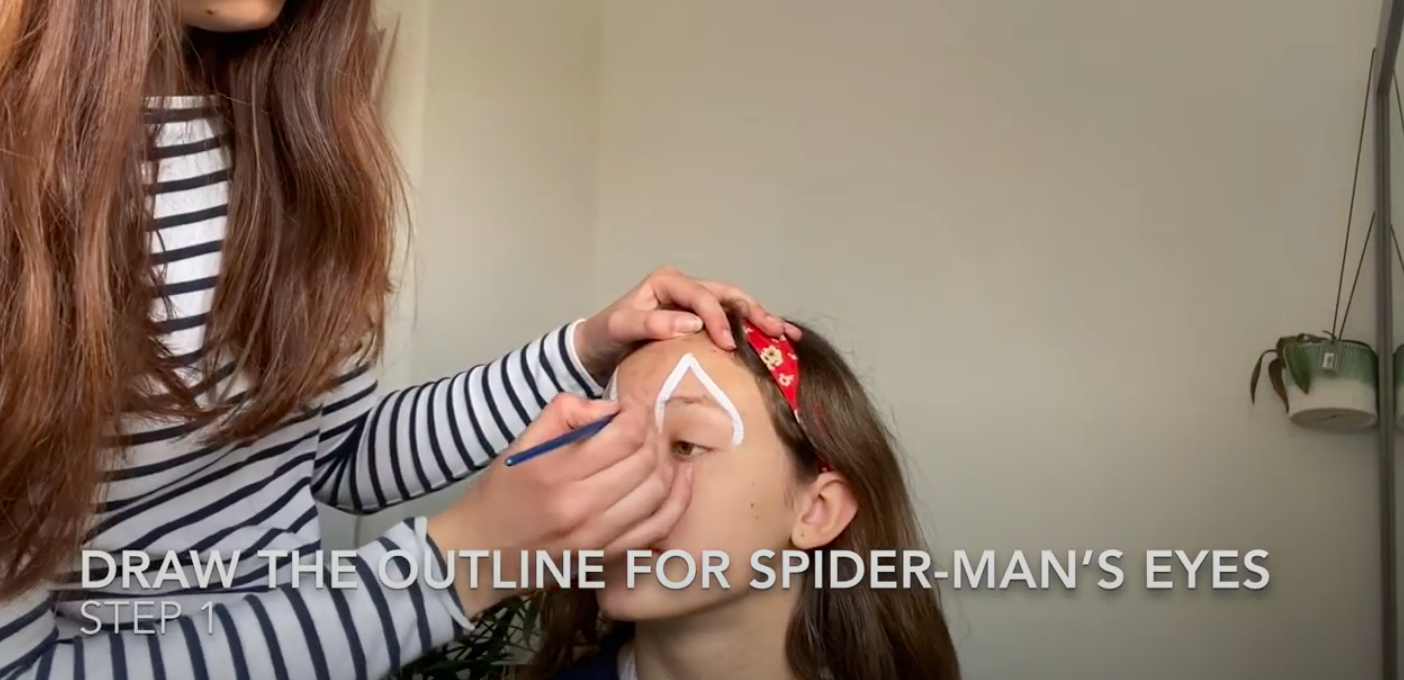
Step 1: Start by outlining in white paint a curved triangle around the eye. Start around 0.5cm above the middle of the eye, then curve the line to each corner of the eye. Depending on the size of the face, it depends on how big you do this.
I often find when face painting for events smaller children, you don’t need to go higher than 0.5cm above the eyebrow, in addition the smaller the brush the more control you will have of what you are painting on the face.
Step 2: Fill in the white eye using a sponge or a brush. Depending on (once again) the size of the face is whether you use a sponge or brush. In the video, I used a sponge due to my model’s face being ‘big’. However, for starter painters and models with smaller faces, a flat brush allows more precision when filling in. When using a brush try to make sure your brush is full coated in white.
TIP: Don’t rush putting paint on your sponge or brush. Keep adding small sprays/drops of water to build up the correct consistency.
Step 3: Painting the red base of spiderman. I have personally painted spiderman over 300 times (LOL) at many face painting events and therefore can approximately see the shape I want to sponge on. However, for beginners, I recommend using a thin brush and painting the outline of the shape to make sponging more accurate. Moreover, if the model has a small face, use the flat brush (the only downside with a brush is the paint is less evenly distributed).
Overall, it may be easier to mix between the brushes and sponge. For example, using the flat brush to outline around the eye and using the sponge to fill in the gaps. Finally, in order to blend out the ages, use a clean (no-paint) and dab at the edges where the paint finishes.
Step 4: Outline the eyes move in small motions to be as accurate as possible. Once again, I recommend using the smallest brush. In order to carry the same consistency of paint along the whole of the eye, spin your brush as you drag the brush down.
Step 5: Draw on straight lines coming out from the middle of the face. In order to keep your lines going from one place, draw a dot in-in between the eyes and focus your lines starting from there.
Step 6: Join up the lines, with curves, separate the curves with 0.5cm creating a spider man look. The curves can differ depending on the size of the model’s face.
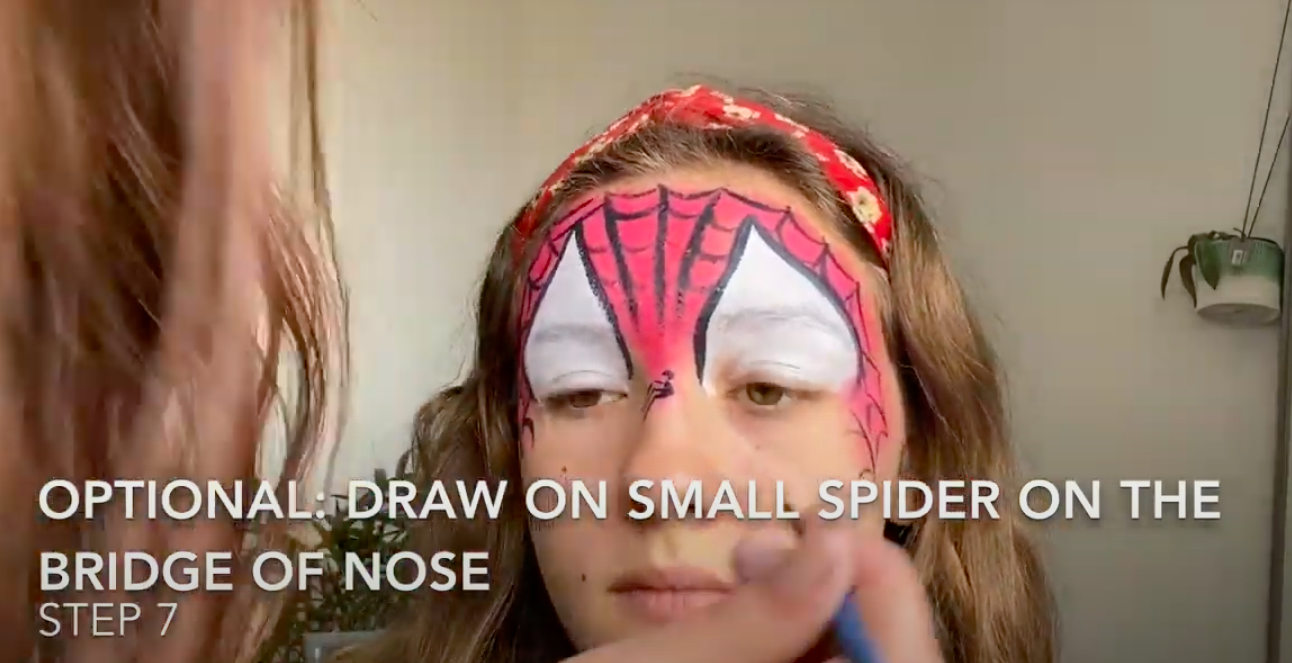
Step 7 (optional): Draw on a small spider using the smallest brush you can find. Start by pressing paint into the bridge of the nose, the flick on the eight legs,
For visual and more information, you can watch our youtube video.
Our other services include:
Balloon Modelling
Candy Floss Hire
Party Package
[btn_dont_miss_out class=””]